So, you have heard about the cloud quite a bit. And you have heard about Amazon Web Services (AWS) as well for quite some time now and you want to get started but need help in setting up your first EC2 instance. Follow the below quick steps and you will be up and running in no time.
Step 1:
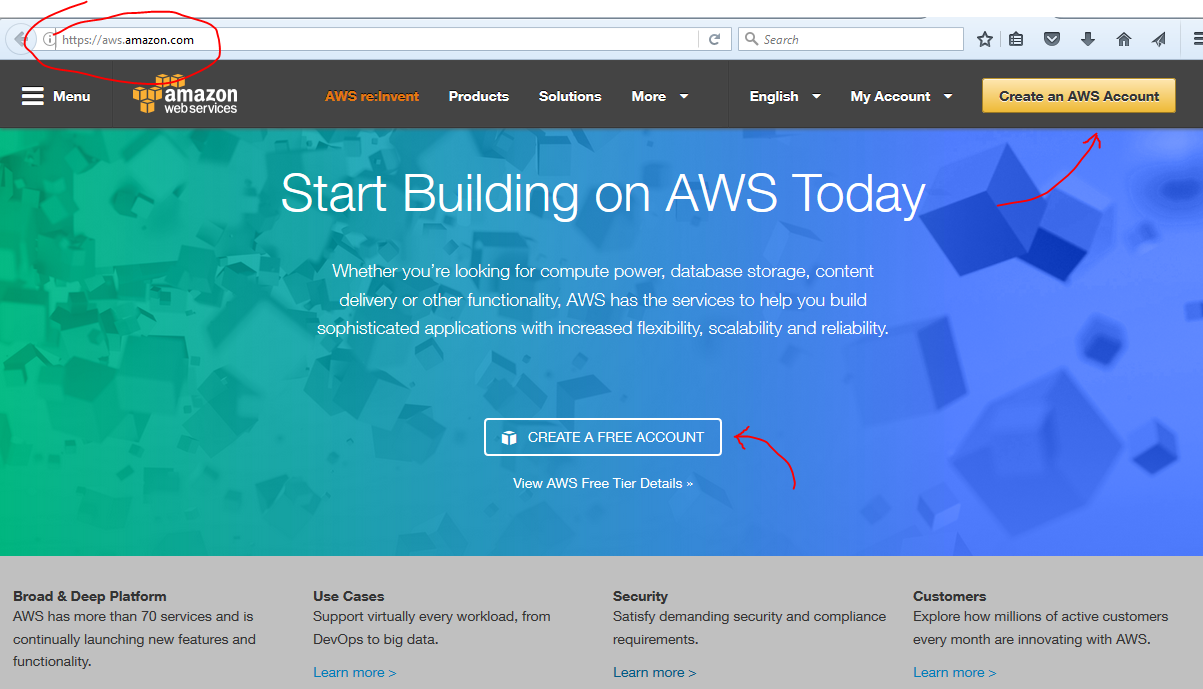
Create your AWS Account (https://aws.amazon.com/)
Step 2:
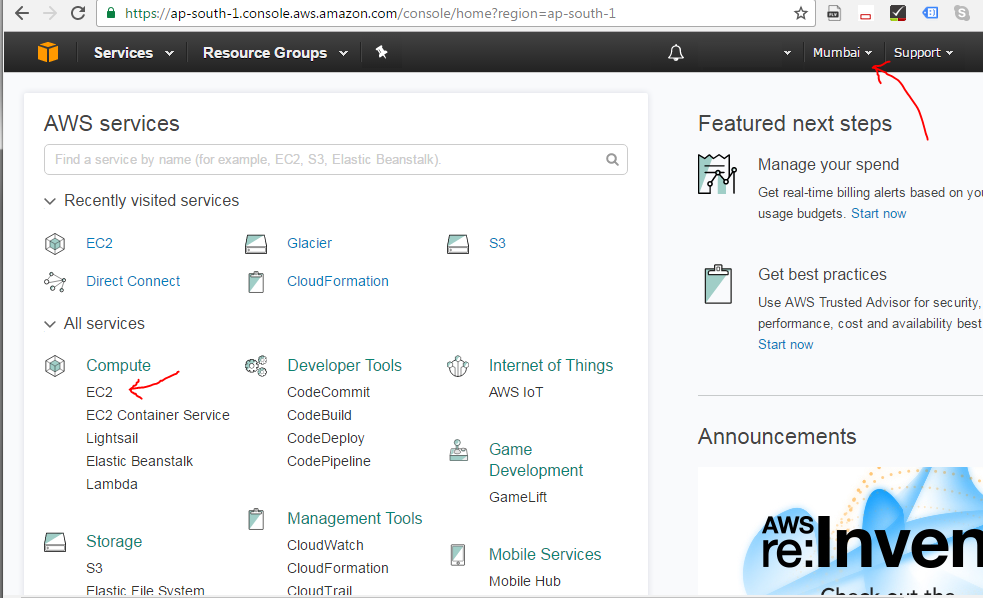
Login to you AWS Dashboard (https://console.aws.amazon.com/console/home)
Step 3:
Make sure you select the correct region you want to setup in on the top right and then click on “EC2”
Step 4:
Click on “Launch Instance”

Step 5:
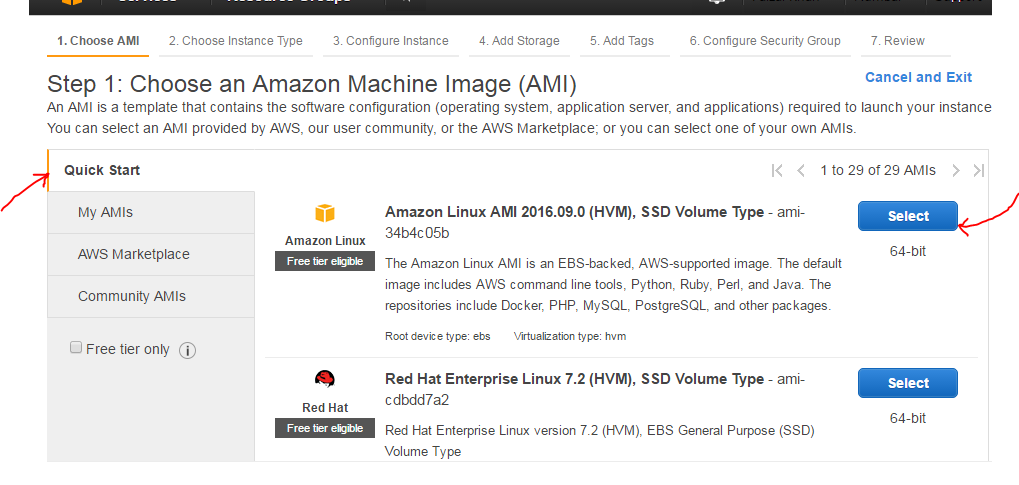
Select an OS/AMI (Disk Image). For the purposes of this quick tutorial, select the Amazon Linux AMI
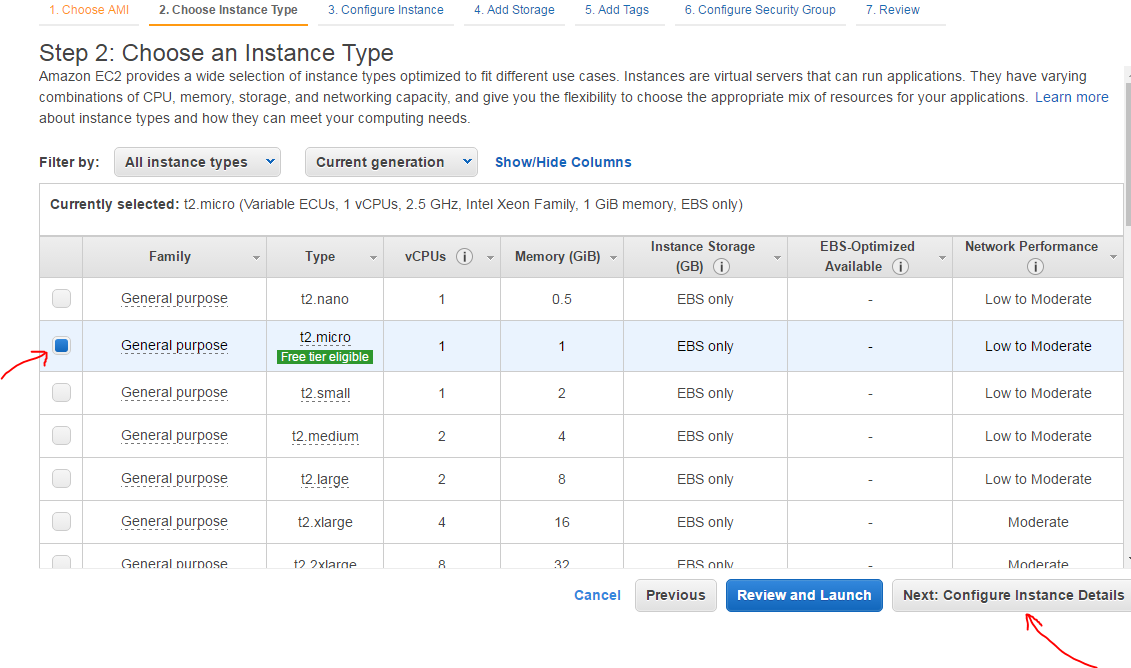
Step 6:
Select the “t2.micro” instance as this is the one included in the free tier. Click Next
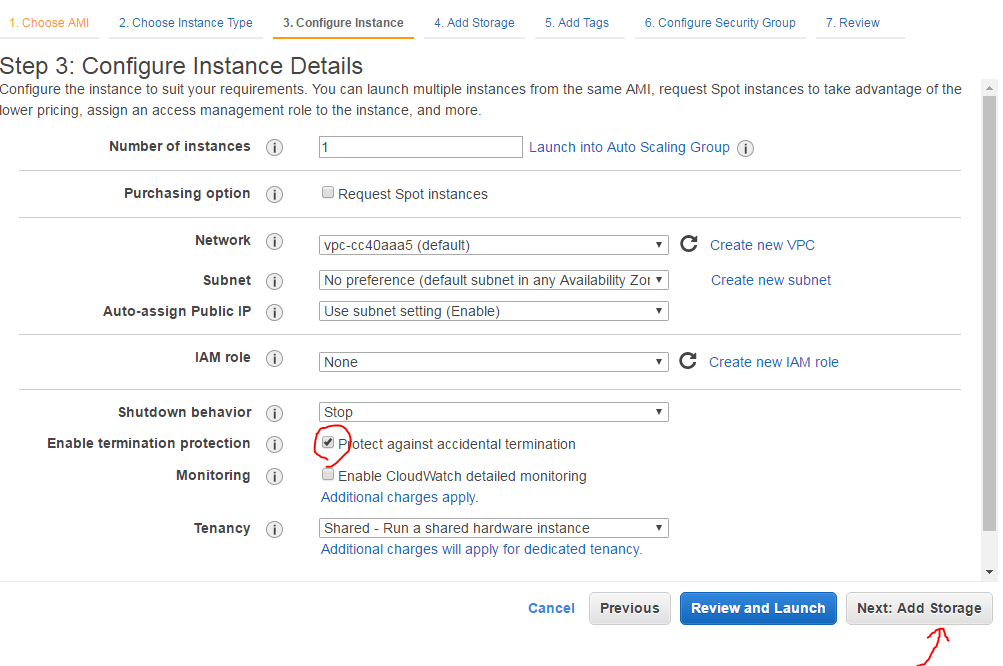
Step 7:
Leave everything at default but check the box that says “protect against accidental termination”. Click Next.
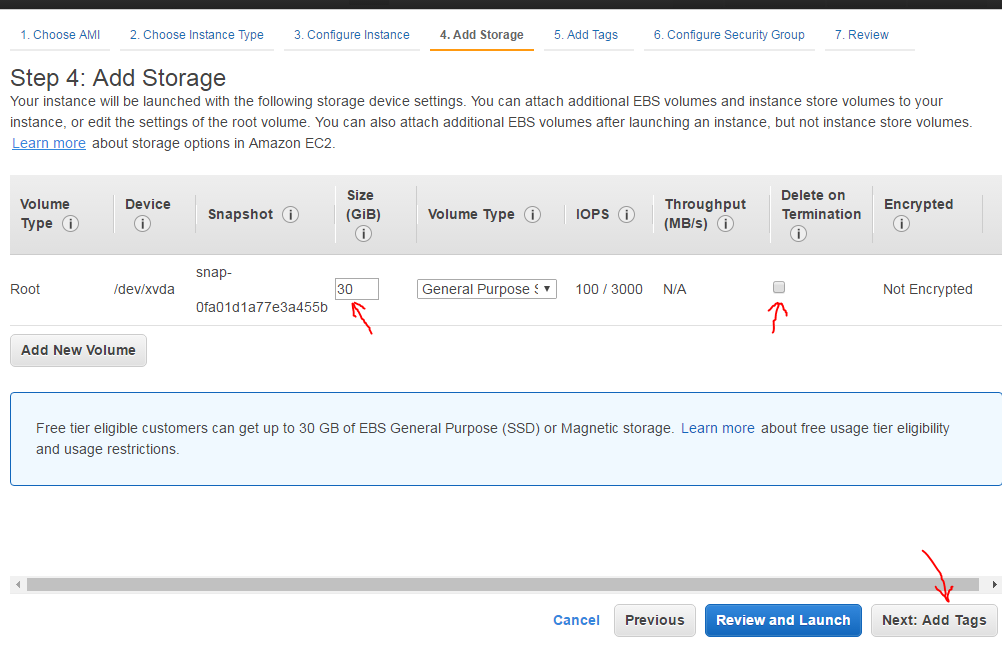
Step 8:
Make the storage size 30GB as this is included in the free tier. Uncheck “delete on termination” and click Next.
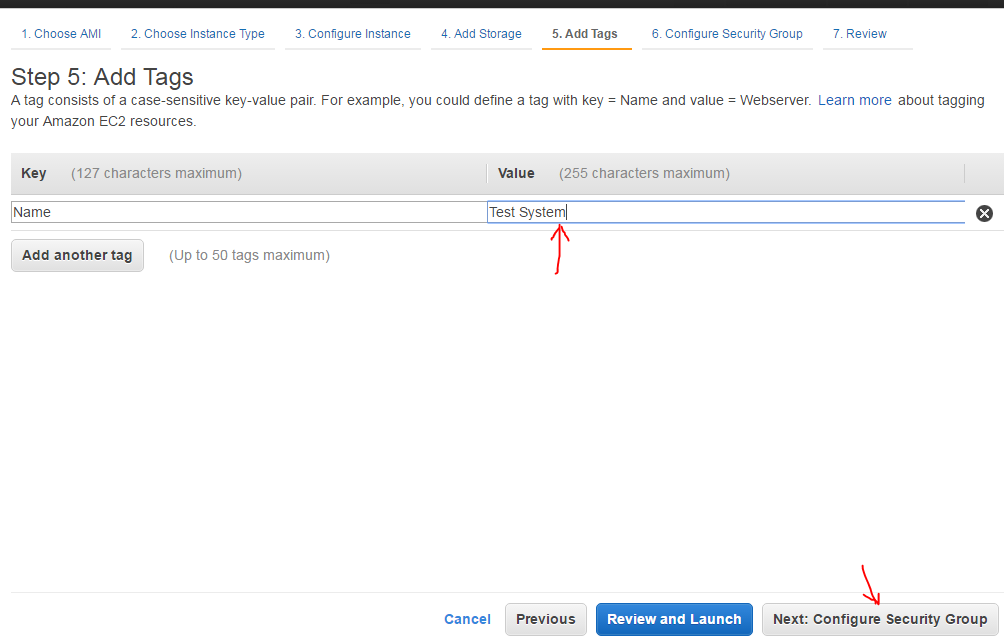
Step 9:
Type in a name to identify your EC2 instance and click Next
Step 10:
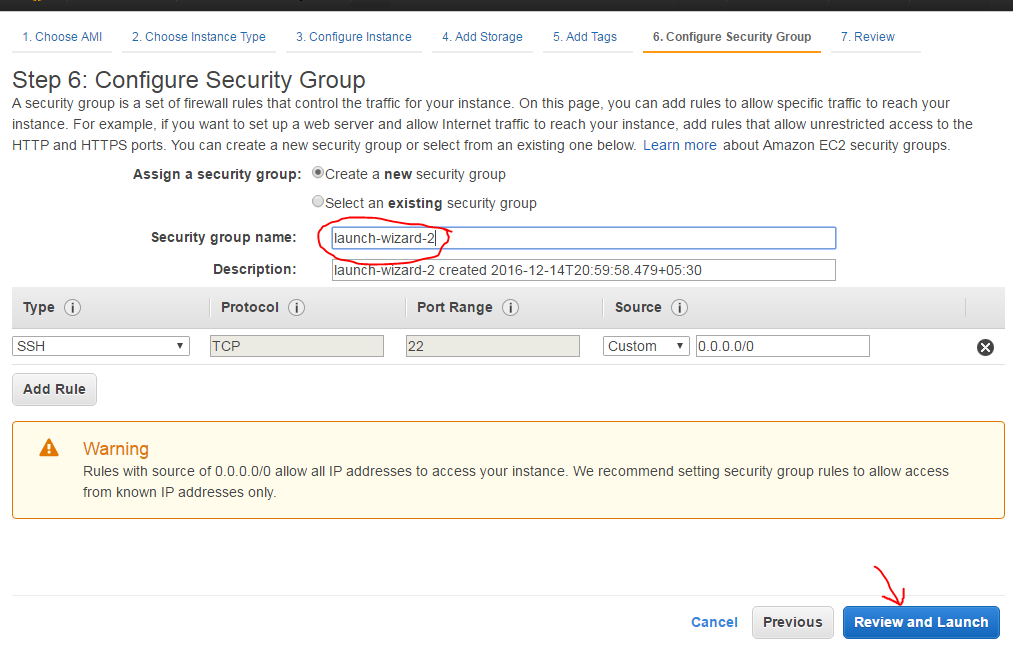
Give your security group a name. For the purposes of this tutorial, we will be enabling only remote access and no www web access. This can be edited at a later time. Click on Review and Launch
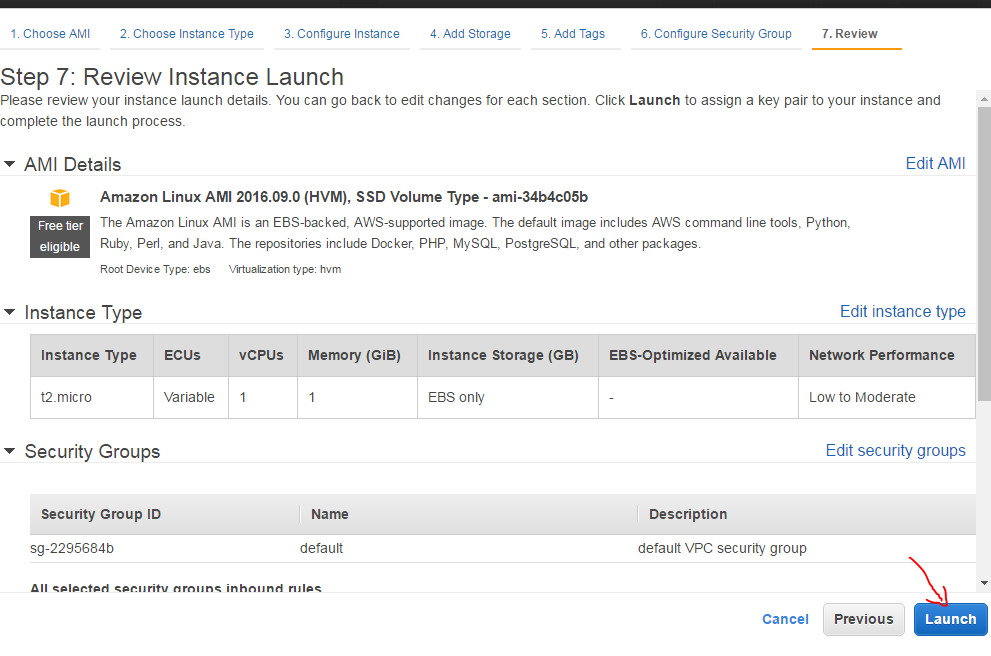
Step 11:
Click on Launch
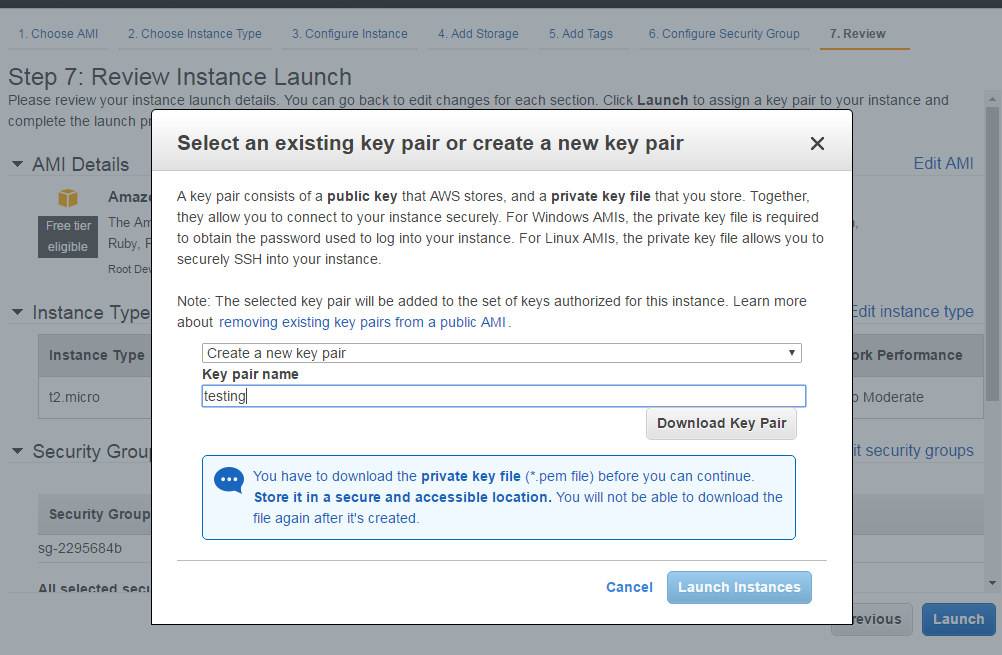
Step 12:
Select create a new key pair, give your key a name and hit the Download Key Pair. This is your SSH key to access your EC2 instance. Make sure you keep it safe in your local system. When you download the key pair, it is downloaded in the .PEM format.
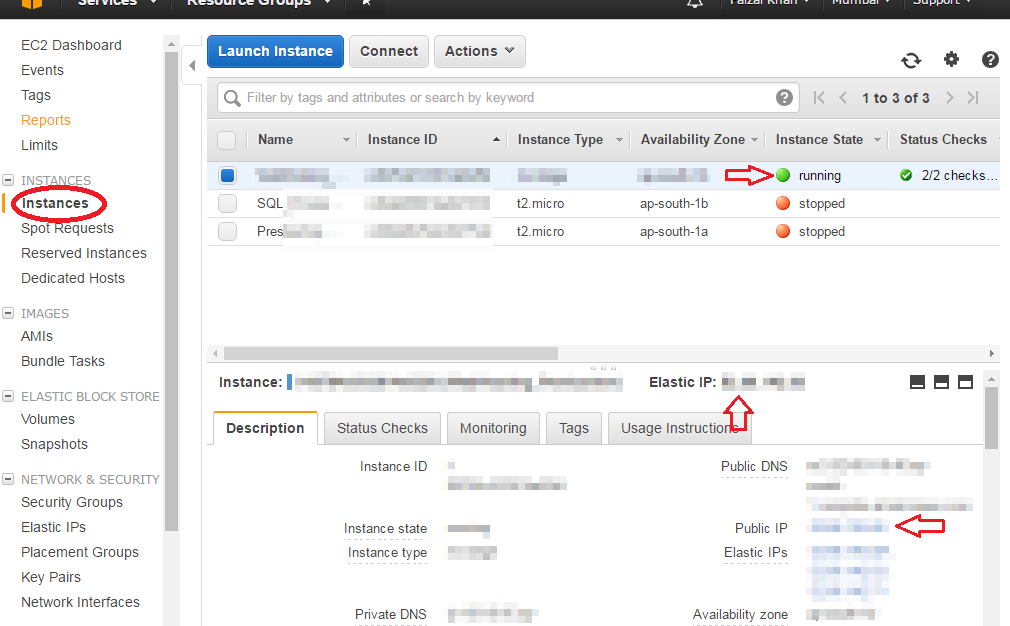
That’s it! Your EC2 instance is now being provisioned. You can go back into the EC2 screen and click on “instances” and see if it is running and ready for use. Find the IP address from the indicated positions in the screenshot and go ahead and use Putty to connect via SSH if you’re on Windows.
Connecting to your EC2
If you are Windows and will be using the PuTTY application to SSH into your server, you need to convert this .PEM format key you downloaded to a .PPK format. To do that, ensure you have download and install the complete PuTTy application package from www.putty.org. Open up PuTTYgen, Go to File > Load private key > select your .PEM format key, then click on ‘Save Private key’. Now you should have the .PPK key. All you need to do now is open Pageant and click on add key and select your .PPK key. You should now be able to SSH into your system using PuTTY.
If you are using a Mac or Linux system, you do not need to convert the .PEM key. You should be able to use it directly to login. Do not attempt to open the key file. Open your terminal and switch to the folder where you have downloaded the key file (If you do not switch directory, you will have to use the full path to the key file location in below commands). Run the below commands. Ignore the brackets < >.
chmod 400 <key_file_name.pem>
ssh -i <key_file_name.pem> <username@ip_or_hostname>
Hope this quick tutorial has been informative enough to help you get started. Keep following the blog for a more detailed write up on what each of the selection in each of the steps mean and also for other great content on AWS.
2 responses on "Setting up EC2 Instances on AWS"
Leave a Message
You must be logged in to post a comment.

 INR ₹
INR ₹
 USD $
USD $
Last note is windows oriented, we have different option in ubuntu. And we can use git in windows just like ubuntu to connect to the ec2 instance.